
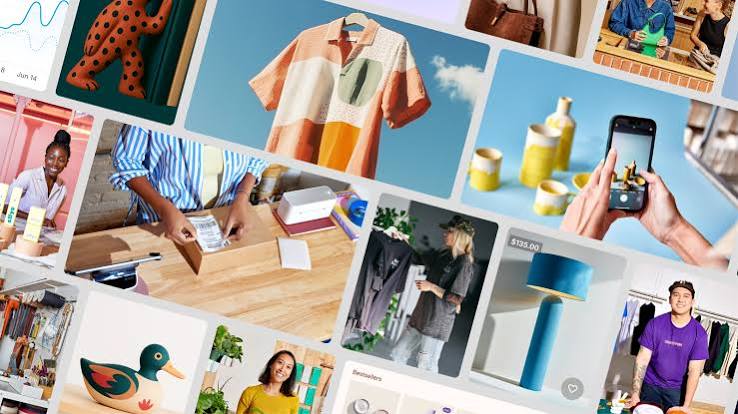
Imagine you are forty-eight hours away from launching a new line of impact-resistant, dual-layer bumper phone cases on your Shopify store. The inventory is sitting in the warehouse, the ad campaigns are built, but your creative team is stuck. The traditional lifestyle photoshoot you ordered weeks ago returned images with mismatched lighting, and the stock photos you tried to edit look cheap, failing to showcase the precise port alignment and matte texture of your product. For Shopify mobile accessories brands, this bottleneck is all too familiar. The pressure to produce high-quality, lifestyle visuals across multiple channels—from the main Shopify product page to mobile collection cards and homepage hero banners—constantly collides with tight budgets and fast-moving launch cycles.
This is where integrating a modern AI image generator like gpt image 2 into your workflow changes the equation. Instead of waiting weeks for studio setups, brands are leveraging gpt image 2 to generate context-rich, high-conversion lifestyle scenes in minutes. The real value is not just generating a pretty picture, but establishing a repeatable, high-fidelity production loop that keeps your product at the center of the story.
Defining the Visual Goal: What Makes a Mobile Accessory Lifestyle Photo Convert?
Before opening any software, you must define what a successful lifestyle image needs to accomplish. The mistake is treating lifestyle imagery as mere decoration, especially when deploying gpt image 2 for commercial assets. For a mobile accessory like a premium phone case or a magnetic card wallet, a lifestyle photo must do more than look aesthetic; it must communicate utility, scale, and tactile quality.
A high-converting lifestyle photo needs to answer three questions for the Shopify shopper instantly: How does the product feel in hand? Does it fit my daily aesthetic? And does it actually protect my device? When you use gpt image 2 to build these scenes, you are not just placing a phone case on a generic background. You are designing an environment that speaks directly to your target audience. For instance, a rugged, dual-layer bumper case belongs in an active, outdoor setting—perhaps held by a hiker with a scenic mountain trail blurred in the background, a composition that gpt image 2 can render with high fidelity. Conversely, a sleek, pastel blue magnetic card wallet converts best when shown on a minimalist desk next to a modern laptop, highlighting its slim profile and professional appeal.
To achieve this, your visual goals must include specific, non-negotiable review constraints. For a mobile accessory brand, these constraints typically involve maintaining a brand-consistent pastel blue hex color (#A3C1AD), ensuring a glare-free matte texture on the case surface, and preserving the precise port alignment of the phone model. The capabilities of gpt image 2 allow creators to specify these exact parameters, ensuring the generated environment complements rather than distorts the physical product. By establishing these visual outcomes early, you prevent the common pitfall of generating beautiful but commercially useless images that fail to match the actual product specifications.
Setting Up the Inputs: Preparing Assets and Prompts for gpt image 2
With your visual goals defined, the next stage of the workflow is preparing your assets and structuring your prompts. To achieve studio-quality results, you cannot rely on simple, single-sentence prompts. A structured input is critical for guiding the AI model to respect your brand guidelines and product details, particularly when working with gpt image 2.
First, prepare a clean, high-resolution cutout of your physical product. If you are showcasing a dual-layer bumper phone case, ensure the cutout has transparent boundaries and highlights key features like the tactile buttons and precise port alignment. Through pikvee’s intuitive interface, you can upload this product image as a reference layer, providing a solid foundation for the gpt image 2 generation process.
Next, construct your prompt using a structured framework. When prompting gpt image 2, you must define the subject, the setting, the lighting, the camera angle, and the specific aesthetic constraints. Here is an actionable prompt template designed for mobile accessories:
[Product Reference] held in a human hand, close-up shot focusing on the texture. Setting: A clean, modern coffee shop table with a ceramic mug and a notebook slightly out of focus in the background. Lighting: Soft, natural morning light coming from a side window, creating realistic shadows. Color Palette: Dominated by neutral tones and a brand-consistent pastel blue hex color (#A3C1AD). Style: Photorealistic, professional product photography, 50mm lens, glare-free matte texture on the case surface.
This works best when you explicitly separate environmental details from product specifications in your gpt image 2 instructions. How gpt image 2 interprets these instructions depends heavily on how clearly you define the boundaries between the reference product and the generated background. To test the approach, you can start by generating variations with gpt image 2 to see how different lighting prompts interact with your product’s colors. Preparing files for gpt image 2 in this structured manner ensures that the final outputs retain the high-fidelity details required for a professional Shopify product page. Within gpt image 2, the combination of precise prompt parameters and image reference inputs significantly reduces the need for extensive post-production editing.
The Execution Loop: Generating and Iterating on Lifestyle Scenes
The core of the workflow is the execution loop, where you generate, evaluate, and refine the visuals. The problem is not getting a single decent image; it is generating a cohesive set of assets that look consistent across your entire Shopify store, which is why mastering the gpt image 2 workflow is essential. This requires an iterative approach, adjusting prompts based on initial outputs and utilizing advanced editing features.
When you begin generating with gpt image 2, start with a medium-resolution test to check the overall composition and lighting. Once you find a composition that works, scale the resolution up. During this phase, using gpt image 2 for regional editing is highly effective. For example, if the initial generation creates a perfect desk setup but the hand holding the phone looks unnatural, you can select that specific region in gpt image 2’s editor and prompt it to regenerate just the hand, keeping the rest of the scene intact.
To streamline this process, refer to the comparison table below, which outlines how to adjust your inputs based on common generation issues:
| Initial Output Issue | Root Cause | Adjustment in gpt image 2 Workflow |
| Product color looks washed out or distorted | Ambient lighting prompt is too aggressive | Specify “neutral studio lighting” and reinforce the brand-consistent pastel blue hex color (#A3C1AD) |
| Case texture looks too glossy or plastic-like | Missing surface texture keywords | Add “glare-free matte texture, subtle micro-grain finish” to the prompt |
| Background is too distracting or cluttered | Depth of field is too wide | Adjust camera parameters to “shallow depth of field, F/1.8 aperture, heavily blurred background” |
Instructing gpt image 2 to render text is another area where the model shines. If your lifestyle scene includes a phone screen displaying a mobile app interface, gpt image 2 excels at rendering crisp, readable text and UI elements directly on the screen, avoiding the garbled characters common in older AI models. Integrating pikvee into your daily design workflow allows you to manage these iterations seamlessly. For a complete campaign, you might need a horizontal banner for your homepage hero banner and a square format for a mobile collection card. By running the gpt image 2 generation loop with adjusted aspect ratios, you can produce tailored assets for each placement. To verify the versatility of these outputs, you can generate alternative backdrops with gpt image 2 to match different seasonal themes.
The Final Release Check: Verifying Brand Alignment and Visual Quality
The final step before publishing your assets to your Shopify store is the release check. A useful mockup does not need to be perfect; it needs to help a team decide if the visual represents the product accurately and aligns with the brand’s standards. When inspecting gpt image 2 outputs, you must establish a rigorous quality control checklist to ensure no artificial anomalies slip through to your live site.
Before exporting the final files, run each image generated by gpt image 2 through the following verification steps:
- Product Integrity: Verify that the physical details of the accessory, such as the precise port alignment and button covers on the dual-layer bumper case, are completely accurate. Any distortion here will lead to customer returns.
- Color Accuracy: Check the colors against your brand guidelines. Ensure the pastel blue hex color (#A3C1AD) is rendered correctly under the simulated lighting conditions.
- Text and UI Legibility: If the image displays a phone screen or packaging, confirm that how gpt image 2 renders the text is clean, sharp, and free of spelling errors.
- Texture and Finish: Ensure the glare-free matte texture is visible and does not look artificially smooth or metallic.
- Aspect Ratio and Resolution: Confirm the file is exported at the correct dimensions for its target placement, whether it is a high-resolution banner or a compressed collection card image.
By maintaining this strict checklist, you ensure that every gpt image 2 generation meets the commercial standards of your brand. While gpt image 2 handles the heavy lifting of background composition and lighting integration, your editorial eye remains the final filter. Utilizing pikvee provides the necessary controls to adjust these final details before the launch. With this gpt image 2 workflow, you can confidently publish high-converting, brand-aligned lifestyle images that drive sales and elevate your Shopify store’s visual identity.