
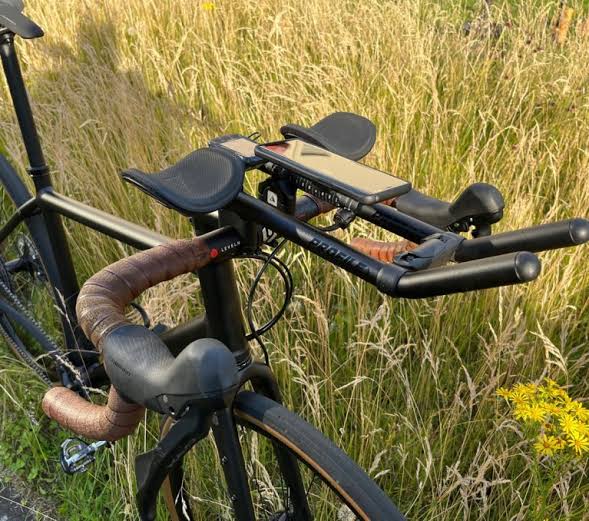
Building a gravel bike from individual parts sounds straightforward. Pick a frame. Choose some components. Put everything together. Ride off into the sunset. Then reality hits.
Every part has to work with every other part. The fork needs to match the frame. The wheels need to fit the fork and frame spacing. The tires need clearance. The drivetrain needs to line up. The brakes need the right mounts.
That shiny new component you found online? It might not fit your build. Different standards. Different dimensions. Different everything.
One mismatched part and your build comes to a stop. Not because the part is bad. Because it doesn’t play well with the rest of your setup. Your smartphone can help as a planning hub for the entire process.
Let’s walk through a phone-first workflow that keeps measurements, specifications, compatibility notes, and component choices organized before anything gets ordered.
Start With a Digital Build Sheet
Pick one place to store everything about your build. A note on your phone. A spreadsheet. A simple document. It doesn’t matter which tool you use. What matters is having everything in one spot.
Write down the basics first. Your riding style. Your height and inseam. The frame size you’re targeting. Tire size. Wheel size. Drivetrain. Brake system. Bottom bracket standard. Axle standard. Handlebar width. Stem length. Seatpost diameter.
Then add the details. Mounting points you’ll need. Estimated weight. Your budget. Links to components you’re considering. Compatibility notes for parts that need to work together. Product pages throw a lot of numbers at you. It’s easy to forget which version of a component you were looking at. That’s why you write it all down.
Organize your notes into sections. Frame goes in one spot. Wheels in another. Drivetrain. Brakes. Cockpit. Contact points like your saddle and grips. Accessories. Tools.
For each component, note the model name, key specifications, price, whether you’ve ordered it yet, and any compatibility notes you need to remember.
Measure the Rider First
Your phone can record measurements. But the measurements themselves should come before frame shopping.
Record your height, inseam, previous bike size, reach preferences, and typical riding terrain. Height alone doesn’t determine frame size.
Open a notes or spreadsheet app. Record measurements in both metric and imperial units if needed. Photograph the measuring setup for reference. Save the frame manufacturer’s geometry chart alongside the measurements. Record the recommended frame size before comparing models.
A frame-size calculator can be a useful starting point, but it doesn’t replace checking the manufacturer’s geometry charts.
Define What “Gravel” Means for Your Build
Before choosing a frame, decide what “gravel” means for your particular use case. Four practical categories cover most gravel riding. Fast mixed-surface riding calls for efficient geometry, moderate tire clearance, lower weight, and responsive handling.
Long-distance gravel demands stable handling, a comfortable fit, wider tires, and useful mounting points. Bikepacking needs larger tire clearance, storage options, rack and fender compatibility, stable geometry, and practical gearing.
Rough or all-terrain riding requires maximum clearance, stronger wheels and tires, stable geometry, and appropriate component standards.
There’s no universally “best” gravel frame. The correct specifications depend entirely on the intended ride.
Choose the Frame First
The frame establishes many compatibility constraints for the rest of the build. Get this wrong, and you’ll end up with parts that don’t fit together.
Tire clearance
Tire clearance varies across frames. Some models work with 40-45 mm tires. Others handle 50 mm or wider.
Don’t just look at the advertised number. Factor in your wheel size, tire casing, mud clearance, rim width, and the tire’s actual mounted dimensions. Those numbers on the spec sheet don’t always tell the full story.
Leave 4-5 mm of space between the mounted tire and the closest part of the frame. That extra room keeps you from grinding through the paint or worse when mud and debris get kicked up.
Frame manufacturers typically design around specific tire sizes:
- 40-45 mm clearance suits fast mixed-surface riding and gravel racing
- 47-50 mm clearance works for rougher terrain and bikepacking
- 50 mm plus clearance handles the most demanding off-road conditions
Geometry
Geometry charts tell you what a frame is trying to do.
Head angle between 70-72 degrees. Gravel bikes land here. Cross-country mountain bikes run 69 degrees for slower, more stable steering.
- Wheelbase shapes how the bike handles. Longer frames hold their line. Shorter frames change direction with less effort.
- Chainstay length changes how the bike behaves. 420-425mm stays feel playful. 430-435mm stays improve climbing traction.
- Stack and reach set your position. Lower stack equals aggressive. Higher stack means comfortable. Longer reach stretches you out. Shorter reach keeps you compact.
Don’t memorize numbers. Match geometry to how you ride. Racing needs quick and aggressive. Touring needs stable and comfortable. Most riders want something in between.
Bottom bracket standard
The bottom bracket specification needs to match the selected crankset and drivetrain. T47 threaded bottom brackets are increasingly common on modern gravel frames. They combine the benefits of larger, threaded bottom brackets with improved durability and easier maintenance.
Press-fit options exist too, but many builders prefer threaded for reliability and the absence of creaking issues.
Axles and dropout standards
Check axle sizes on front and rear axles before purchasing wheels. The majority of current gravel bikes have front and rear thru-axle sizes of 100×12 mm and 142×12 mm respectively.
UDH compatibility
Universal Derailleur Hanger (UDH) technology is an innovative approach to derailleur hanger manufacturing. It becomes easy to locate a matching hanger wherever your travels lead you. Many modern gravel frames now include UDH compatibility, which also allows upgrading to SRAM Transmission systems in the future.
UDH has become a key specification because it:
- Standardizes replacement hanger availability across brands
- Enables direct-mount derailleur installation on compatible frames
- Prepares the drivetrain for future upgrade to 13-speed
- Minimizes the possibility of getting stuck due to a broken hanger in the wild
Mounts and storage
For bikepacking and practicality-based frames, look at bottle mounts, rack mounts, fender mounts, and frame storage features. Some frames now include internal downtube storage hatches, which are watertight and can hold tools, CO2 inflators, tire levers, and snacks.
Look for:
- Three bottle cage mounts for extended range
- Top tube mounts for bento boxes and feed bags
- Fork mounts for additional cargo capacity
- Fender compatibility for wet-weather riding
- Rack mounts for commuting and touring setups
Cable routing
Internal routing provides a clean appearance. But builders should also consider maintenance and component compatibility. Full internal cable routing systems work with both mechanical and electronic groupsets. Some frames use pre-installed guide tubes that make the routing process significantly easier.
Knowing how you intend to ride the bicycle will give you the opportunity to compare Carbon Gravel Bike Frames based on their specs relevant to the build and not just the fact that the frame is lightweight or aesthetically pleasing.
Build a Compatibility Checklist
Once the frame is selected, create a compatibility checklist before purchasing remaining components.
| Frame Specification | What to Match |
| Frame size | Fork, seatpost, cockpit and fit |
| Tire clearance | Tire + wheel combination |
| Bottom bracket | Crankset |
| Axle standard | Wheelset |
| Brake mount | Brake calipers/rotors |
| Seatpost diameter | Seatpost |
| Headset standard | Fork/cockpit |
| Drivetrain compatibility | Groupset and cassette |
| UDH compatibility | Future drivetrain upgrades |
| Mounting points | Bags, bottles, racks and fenders |
Special consideration should be given to the drivetrain. Shimano GRX and SRAM AXS/XPLR groupsets have incompatible cassettes and chains. If you have 12-speed, then 12-speed-compatible cassette, chain, and shifters need to be used together. It is also necessary to consider the battery mounting and charging options when choosing a frame.
Groupset compatibility checklist
When selecting components, verify these critical match points:
- Cassette freehub body – SRAM 10-tooth cassettes require an XDR freehub. Shimano and standard cassettes use a different spline pattern.
- Chain type – SRAX AXS uses flat-top chains. Shimano uses standard chains. They’re not interchangeable.
- Brake mount standard – Most modern gravel frames use flat-mount disc brakes, but older frames may have post-mount.
- Crankset chainline – Road chainlines (43.5mm) vs. gravel-specific (47mm) affect front derailleur setup on 2x systems.
Gravel Build Component Selection
Your frame choice determines many component choices. Here’s what to consider for each major component category.
Drivetrain: 1x vs. 2x Setup
In 1x drivetrains, a single chainring is used with the wide-ratio cassette, while in 2x drivetrains, a double chainring is used together with the narrow-ratio cassette.
Choosing between them comes down to your intended terrain:
- 1x advantages: Lower weight, simpler operation, better chain retention on rough surfaces, fewer mechanical complications, sequential gear access without cross-chaining concerns
- 2x advantages: Smaller jumps between gears, higher top-end speed on pavement, more total range for diverse terrain, better efficiency for road sections
Some riders prefer a single-chainring setup for its simplicity and mud clearance. Gravel-specific derailleurs from Shimano GRX, SRAM XPLR, and Campagnolo Ekar include clutches to keep chains taut over rough terrain.
Mullet builds combine road shifters with mountain bike derailleurs and cassettes. This approach delivers ultra-low gears for loaded bikepacking or steep climbs. SRAM’s electronic AXS system makes mixing road and mountain components straightforward.
Groupset budget breakdown:
| Tier | Example Groupset | Typical Cost | Best For |
| Premium | SRAM Red XPLR AXS, Shimano GRX Di2 | $1500-2500 | Racing, weight weenies |
| Performance | SRAM Force XPLR AXS, Shimano GRX RX810 | $800-1500 | Frequent riders |
| Value | SRAM Apex, Shimano GRX RX400 | $400-800 | Budget builds |
Wheels and Tires
Wheel choice affects weight, durability, and ride quality. Key considerations:
- Internal rim width – 21- 25 mm works for 40- 45 mm tires. Wider rims support larger tires better.
- Hub standards – Match front and rear axle spacing to frame specifications.
- Tubeless compatibility – Most modern gravel setups run tubeless for puncture protection and lower pressures.
Tire selection significantly influences ride feel and performance:
- 40-42mm – Rolls fast on pavement, works for mixed-surface riding
- 45-47mm – Balanced for most gravel conditions
- 50mm+ – Maximum traction and comfort for rough terrain and bikepacking
Cockpit and Contact Points
Handlebar width, stem length, and saddle choice affect rider position and comfort over long distances.
Gravel-specific handlebars typically feature:
- Flared drops – Wider in the drops for control on descents
- Short reach and drop – Easier access to brake levers from the drops
- Ergonomic tops – Comfortable hand positions for long days
Stem length influences steering response and rider position:
- Shorter stem (60-80mm) – Quicker steering, more upright position
- Longer stem (90-120mm) – More stable steering, stretched-out position
Use Photos to Track Details
Your camera can be surprisingly useful during a bike build.
Take pictures of existing parts prior to removal if parts are being transferred from another bicycle. Take pictures of cable routing to ensure the original route is remembered. Take pictures of labeling and marking on tires, wheels, brake assemblies, components, cables, and bearings that are hard to remember later.
Take pictures of the completed system from various angles, including the sides, front, back, and drivetrain side.
Track the Budget
A frame is only one part of the final cost. Calculate the total cost of building, including the frame, fork, wheels, tires, groupset, bottom bracket, brakes, handlebar, stem, seat post, saddle, pedals, cables and hoses, tubeless kit, accessories, tools, and shipping and taxes.
Make three columns of estimated, cost ordered, and actual cost to demonstrate how the project is veering away from its budget.
A spreadsheet app or even a basic notes app works fine. No specialized cycling software needed.
Organize the Assembly Process
Once the parts arrive, use the phone as an assembly reference. Create a simple sequence. Inspect the frame and components. Confirm the frame size and specifications. Check all parts against the compatibility list.
Install the headset and fork. Install the bottom bracket and crankset. Install the drivetrain. Install brakes. Install wheels and tires. Install cockpit and contact points. Set saddle height and position. Check torque specifications. Inspect the entire bike before the first ride.
Smartphone notes and online guides are references, not substitutes for manufacturer instructions. Torque values should come from the component manufacturer. Critical work such as braking systems, steering components, and carbon components should be completed according to the relevant specifications.
Use the First Ride as a Real-World Test
The first ride shouldn’t just be about enjoying the finished bike. Use it as a controlled test. Tire pressure, distance, terrain, weather, level of comfort, handling, gearing, braking, unusual sounds, fitting problems, and adjustment points should all be recorded.
Log your rides simply. For instance, Ride one is 35 kilometers long, with 60 percent paved road and 40 percent gravel, with tire pressure set at 38 and 40 PSI. The saddle is too high; reduce it by 5 millimeters for your next ride.
The phone will keep track of how your bike performs rather than just being used for shopping.
Turn Ride Data Into Setup Decisions
Repeated ride notes help riders make more informed adjustments. Repeated hand discomfort suggests checking handlebar position, reach, bar width, and fit. Frequent rim strikes point to reviewing tire pressure, tire volume, wheel choice, and terrain.
An unstable feeling at speed means reviewing fit and geometry before changing multiple components at once. Poor uphill performance means looking into total weight, tires, gearing, and cycling position instead of always pointing to the frame.
Try to alter only one variable at a time if possible. This helps to avoid the typical scenario of altering all the above-mentioned variables at once and not knowing which one made the difference.
Keep a Digital Maintenance Record
After building your bike, you can use the same project file as a maintenance document. Tire changes, chain changes, brake pad replacements, tubeless tire sealant updates, bearing servicing, torque checking, wheel service, component replacements, and any sort of impact check are things you should note down.
Rather than trying to keep track in your mind of how long it’s been since a certain component has been serviced, you will have all the information on your smartphone.
In the case of a carbon fiber frame, an unexpected impact cannot be ignored simply because the frame is intact.
Back Up the Information
Your build generates a lot of important information. Receipts, warranty documents, frame specifications, serial numbers, component models, geometry charts, setup measurements, maintenance records, and photos. All of it matters.
Keep copies somewhere other than just your phone. If your device gets lost, damaged, or replaced, you don’t want to start from scratch trying to remember every detail. A quick backup now saves hours of frustration later.
The Smartphone Should Help, Not Dictate
Your phone keeps things organized. It can’t tell you if a frame fits your body, if a geometry choice feels right, if a component is safe, or if carbon has sustained damage. It also can’t judge whether a particular setup suits your experience level.
Think of the phone as your reference system. The real decisions still come down to measurements, manufacturer specifications, mechanical knowledge, and how things feel on the road.
Final Checklist
Before you order anything, run through this list.
Rider:
- Height recorded
- Inseam measured
- Previous bike size noted
- Riding position thought through
Frame:
- Correct size confirmed
- Tire clearance verified
- Geometry reviewed
- Bottom bracket standard checked
- Axle standards confirmed
- Brake mount identified
- Seatpost size noted
- Mounting points counted
Components:
- Wheels match frame specs
- Tires fit with room to spare
- Crankset works with bottom bracket
- Drivetrain components are compatible
- Brakes mount correctly
- Cockpit dimensions fit your body
- Torque specifications saved somewhere accessible
Project:
- Budget set
- Product pages saved
- Receipts backed up
- Serial numbers photographed
- Assembly notes created
- First-ride setup recorded
Build From the Frame, Refine From the Ride
Building your own gravel bike doesn’t need to be complicated. A little planning goes a long way.
Keep all your measurements, specs, component choices, costs, photos, and maintenance records in one place. Your phone handles that job well.
The most important decision comes before you start filling your shopping cart. Pick a frame that matches how you actually ride. Not what looks cool. Not what weighs the least. What works for your terrain, your distance, your style.
Once you understand the frame’s size, geometry, tire clearance, standards, and mounting options, everything else falls into place.
Figure out your riding style. Take your measurements. Choose your frame. Double-check compatibility. Gather your parts. Build with care. Take notes on those first rides. Adjust as you go.
https://copywritely.com/tools/copywritely/task_sharing/735e9e3